

Microsoft Dynamics 365 has a tool that can help you create professional-looking email templates and save time. Email templates contain prefilled data that you specify, so you don't have to re-enter the same information for each email (like someone’s first name). See how to create email templates in Microsoft Dynamics 365 below.
First thing to note is that email templates can be accessed and created in multiple ways. They can be accessed via the legacy settings interface within Microsoft Dynamics 365 (soon to be phased out), user personal settings, or the Power Platform admin center. For this example, we will access from the Power Platform admin center.
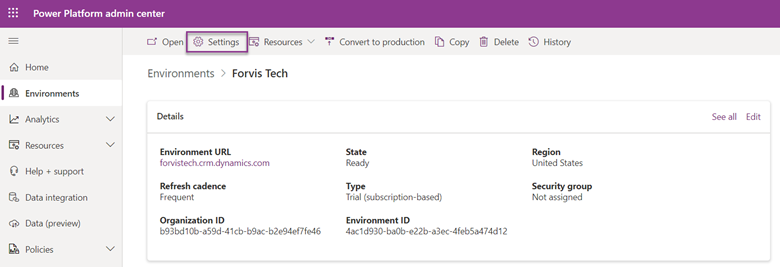
- Open the Power Platform admin center. Then, navigate to the Environments tab and select the environment in which you want to work.
- Click Settings:
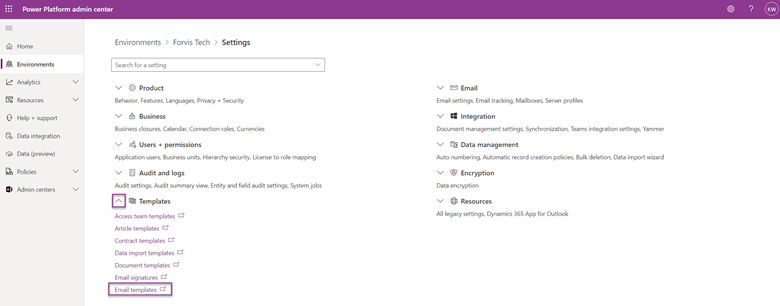
- Expand Templates and select Email templates:
- Click New on the Actions toolbar.

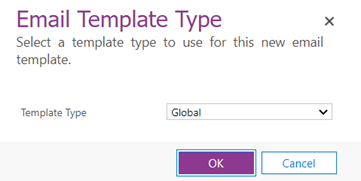
- In your Email Template Type dialog box, in the Template Type list, select the type, and then click OK.
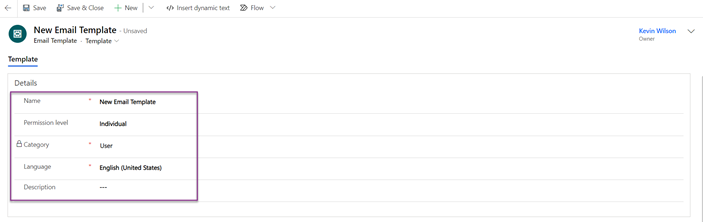
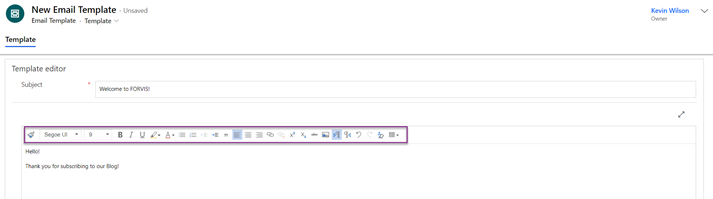
- Give your email template a Name on the template form. You can add a description, too. The email template name and description are not visible to the recipient.
- Type the text you want to send in the message. Use the formatting toolbar to edit your text. Check your grammar and make the formatting visually appealing to your audience.
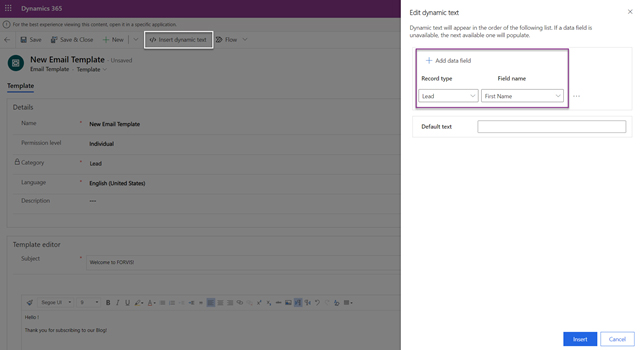
- If you would like to add data fields to display information like your customer’s name, company name, etc., select Insert dynamic text; then, click Add data field in the dialog box.
- In the dialog box, select the desired Record type and Field name.
- Click Insert to add the data into the email template.
- Reminder: A customer’s first and last names are separate data values and need to be entered separately. Repeat step eight for all the data you’d like to put into your email template.

- Once you are happy with your email template, click Save or Save and Close.
Do you need help navigating your Microsoft Dynamics 365 environment? Let the Business Technology Solutions Team at FORVIS help you find answers. We are a Microsoft Dynamics Gold Partner and 2022 recipient of the Microsoft Inner Circle Award. Use the Contact Us form below to send a question.