

In this brief Sage Intacct tutorial with video, we’ll show you how to use Smart Rules on transactions to help reduce transaction posting issues. In this example, when a specific vendor is entered on an accounts payable (AP) bill, the company wants the department assigned to that vendor used on other AP field detail lines. To do this, we’ll create a custom field and Smart Rule to automatically add vendor details on AP bills.
First, we’ll add a custom picklist field on the vendor record to indicate the specific vendor-required department. Then, we’ll create a Smart Rule to require that department be used on other applicable AP field detail lines.
Create a Custom Field
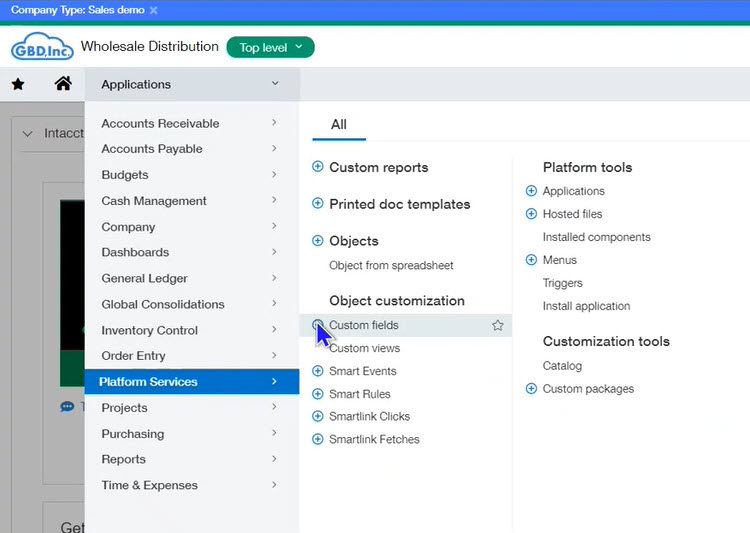
First, go to Platform Services and select “Custom fields” as shown below.
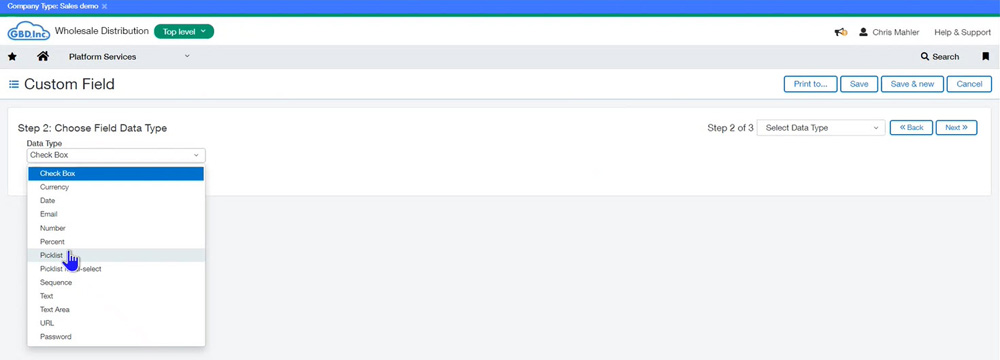
Choose “Vendor” as the Object to Extend and then click the Next button near the top right of the screen. Select “Picklist” as the Field Data Type and then click the Next button again.
In Step 3, type in a label for the custom picklist field that will display on a vendor record. After you enter a label, the Field ID will autopopulate. Add your department IDs as Pick Values as shown below. If the department IDs are out of order or if you’d like to set the first value as the default, check the boxes beneath the Pick Values field. In addition, you can provide the purpose of or details about this custom picklist in the Description box.
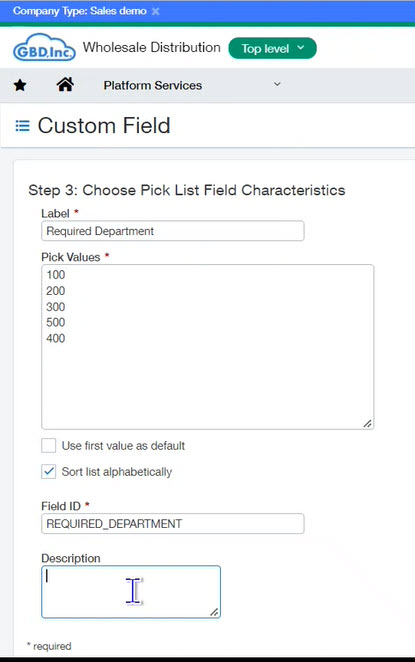
Click the Next button to proceed.
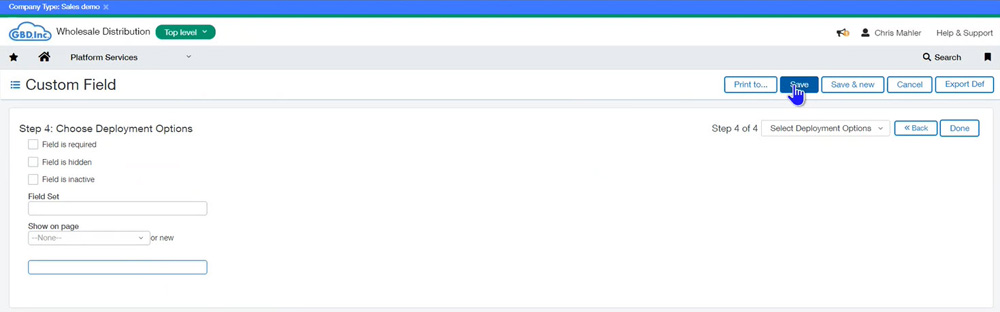
In this step, you have options to make the picklist field required, hidden, or inactive. (You may want to inactivate it if you stop using it or it’s no longer required.) Here, you also can set the different areas on vendor records you may want your custom picklist field to display. If you leave the options blank, it will default to showing on the first field set on the Vendor tab in the Vendor Information screen. When you’re done with this step, select the Save button.
Create a Smart Rule
The next major step in this process is to create a new Smart Rule. To do this, go to Platform Services and select “Smart Rules.”
Choose “AP Bill Detail” as the Object to Extend and then click the Next button.
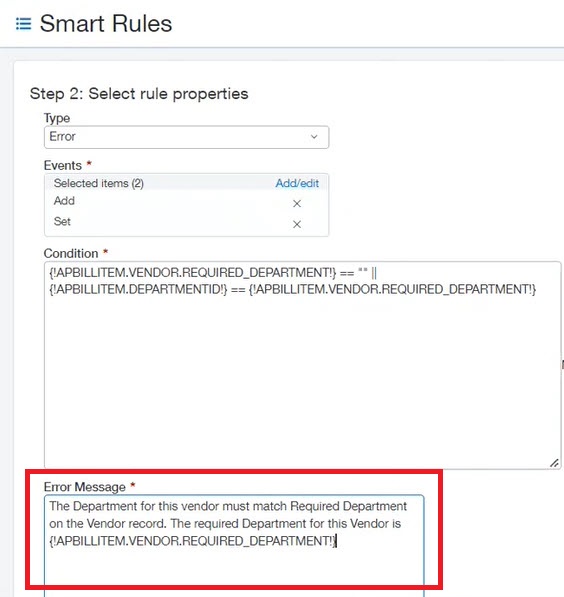
In Step 2, you can select Error or Warning. A “warning” will allow users to post the transaction after the warning message appears. An “error” will not let users post the transaction until the issue is resolved. In this example, we’ll choose Error.
Then, under Events, choose “Add” and “Set.” “Add” will be used when creating a bill and posting; “Set” will be used when editing a bill and posting. Next, you’ll write the Condition. Use the Field Lookup button in the top right of the screen to select “Department ID” from the AP Bill Detail section and our custom “Required Department” field from the Vendor section as shown below.
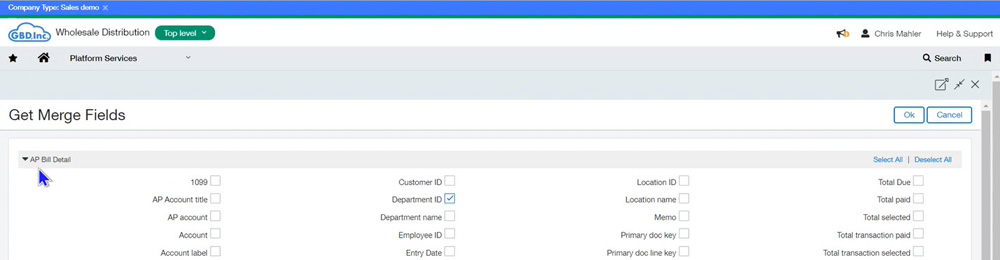
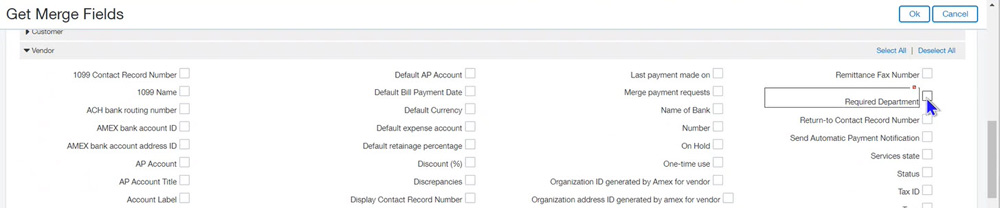
Click the OK button to confirm your selections.
Enter the Smart Rule Condition as: {!APBILLITEM.VENDOR.REQUIRED_DEPARTMENT!} == "" || {!APBILLITEM.DEPARTMENTID!} == {!APBILLITEM.VENDOR.REQUIRED_DEPARTMENT!}
Also include a custom message in the Error Message box to help users understand what needs to be corrected. See an example below.
Click the Next button to proceed.
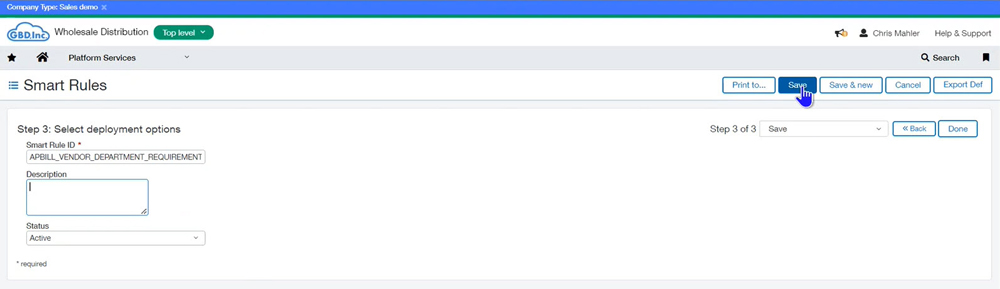
In Step 3, give your Smart Rule a name in the ID field. Note: You cannot use spaces; you can use an underscore instead. You also can include a description. Set the Status as “Active” and then click Save.
Now you can test your new custom field and Smart Rule in Sage Intacct.
Watch this video to walk through these steps and see how to test your new custom field and Smart Rule!
The Business Technology Solutions Team at FORVIS has certified experience with Sage Intacct and other Sage business applications. We provide analysis, design, implementation, upgrade, training, and support services. Use the Contact Us form below to let us know how we may assist you.
Related reading: Check out another Sage Intacct tutorial, “How to Create a Smart Event for Email.”