

There are many systems today still using eXtensible Markup Language (XML) to exchange system information. As systems modernize, there’s been a move to leverage JavaScript Object Notation (JSON) to format data. JSON, in many cases, can be easier to use when dealing with integrations. However, if you find yourself in the situation where your source system provides XML as the data format, there’s a way to convert XML to JSON in Microsoft Power Automate and Azure Logic Apps.
Below, we’ll help guide you through the conversion process using built-in data operations, such as the Compose action or Parse JSON action. Please note that paid solutions exist in the marketplace that could make converting XML to JSON even easier, e.g., Microsoft Integration Account Transform XML connector. However, our focus will remain on using “out of the box” Power Automate and Azure Logic Apps functions to convert XML to JSON.
Steps
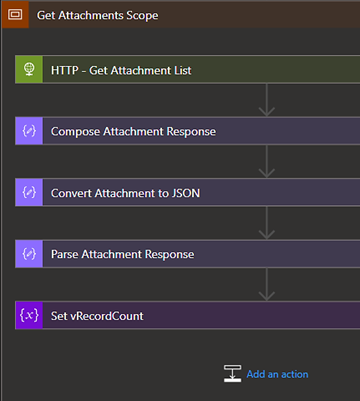
As shown in this FORsights™ article, “Sage Intacct Session Authentication: Developer Tips,” we’ll build upon this example to illustrate how to receive a response from the Sage Intacct API and convert XML data into the JSON format. We’ll use the “Get Attachment List” API call from Sage Intacct to showcase how to retrieve a value from XML response data and set it to a variable.
HTTP – Get Attachment List
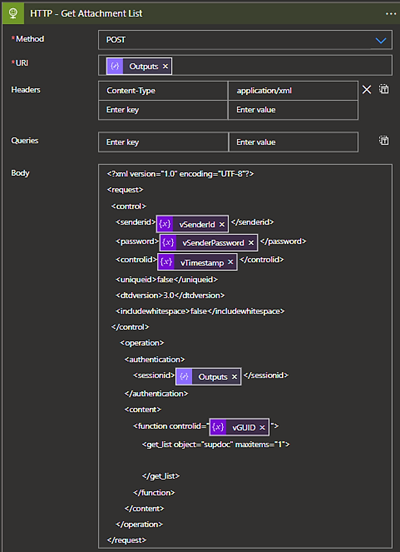
The first step is to make an HTTP request call. We named the action “HTTP – Get Attachment List.” Note: If you’re following the Sage Intacct example, you’ll need the Session ID and Temp Session Endpoint from the “Get Session ID” API call.
Compose Attachment Response
After the call is made, you should receive an XML response. For the second step, use a Compose statement to begin setting up the process. Name the action and set the input of the “Compose Attachment Response” to be the body response from the “HTTP – Get Attachment List.” You can use either Dynamic content or Expression here.
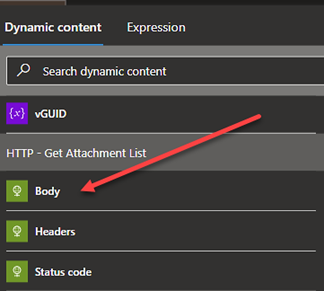
body('HTTP_-_Get_Attachment_List')
Note: We’re referencing the body from the previous action.
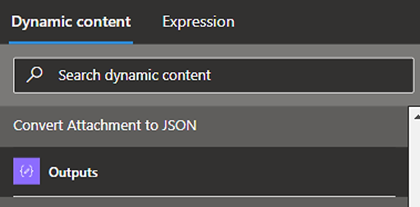
Convert Attachment to JSON
The next step is to add another Compose action to the designer. We named it “Convert Attachments to JSON.” From here, we’ll use multiple built-in functions to help us convert XML to JSON.
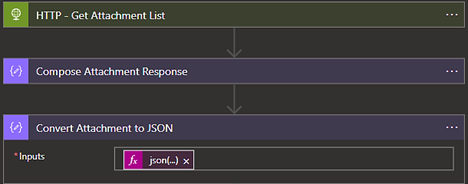
Within the inputs of the newly added compose statement, begin to build the JSON.
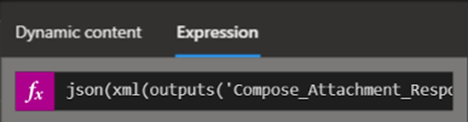
Start by getting the output from the “Compose Attachment Response” action: outputs('Compose_Attachment_Response')
Then wrap the output statement with “xml()” to identify XML: xml(outputs('Compose_Attachment_Response'))
Finally, add the json() function to tell the system to convert the data to JSON: json(xml(outputs('Compose_Attachment_Response')))
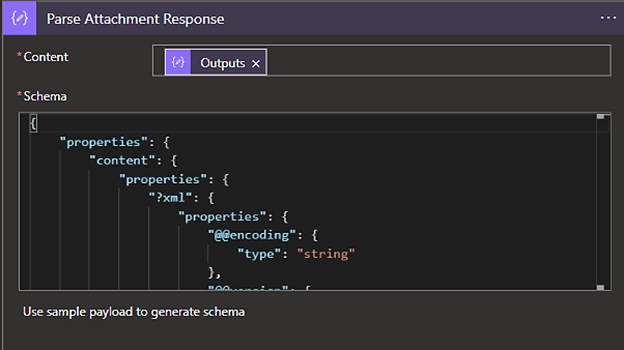
Parse JSON Response
The next step is to add a Parse JSON action to the designer. To do this, use the output from the “Convert Attachment to JSON” as the input for the Parse JSON action.
Then, input the schema.
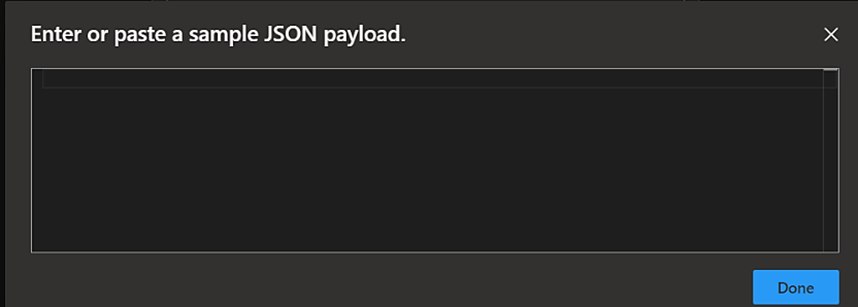
If you don’t already have the schema, you can click on “Use sample payload to generate schema.” This will automatically generate the schema for you.
If you’re unsure about what the schema should look like, you can run the Power Automate or Azure Logic Apps flow before you add the Parse JSON action. This can produce output from your “Convert Attachment to JSON” action. Then, you can copy and paste the output content into the JSON payload.
Get Value From JSON
The final step of this process is to retrieve a value from the XML response data and set it to a variable. In this example, we’ll obtain the total number of records returned from our “HTTP – Get Attachment List” call and set it to a variable.
Since we included the Parse JSON action, we now can scroll down and select the “@total” field from the Dynamic content section.
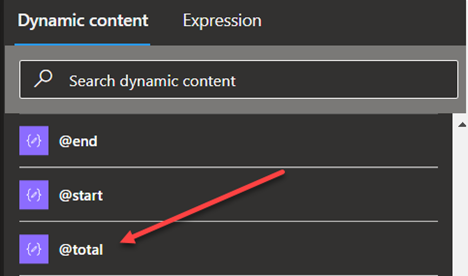
Here is the same thing written out if you wanted to use the Expression: body('Parse_Attachment_Response')?['response']?['operation']?['result']?['listtype']?['@total']
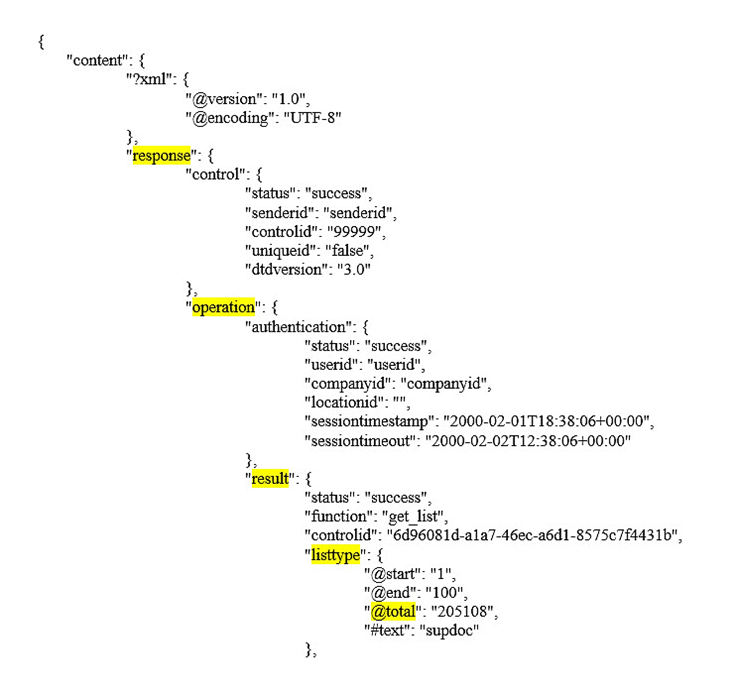
Below is sample data that’s been converted to JSON. The highlighted areas show how we got to the “@total” value.
How FORVIS Can Help
The steps in this article can help guide developers through the process of converting XML to JSON using Power Automate and Azure Logic Apps functions. For more developer tips or support services, use the Contact Us form below to get in touch.
The Insights & Automation team at FORVIS can help organizations use technologies to gain efficiencies in business processes and meet an ever-changing landscape. Service offerings include business intelligence and Microsoft Power Platform assessments, along with software implementations and app-to-app integrations. We are a Sage Partner, Microsoft Dynamics Gold Partner, and 2022–23 recipient of the Microsoft Inner Circle award, in addition to the Solver Evangelist of the Year award.