

The big acronym in data integrations is ETL (extract, transform, and load). You can use the ETL process when you’re working with data from a source and putting it into a destination.
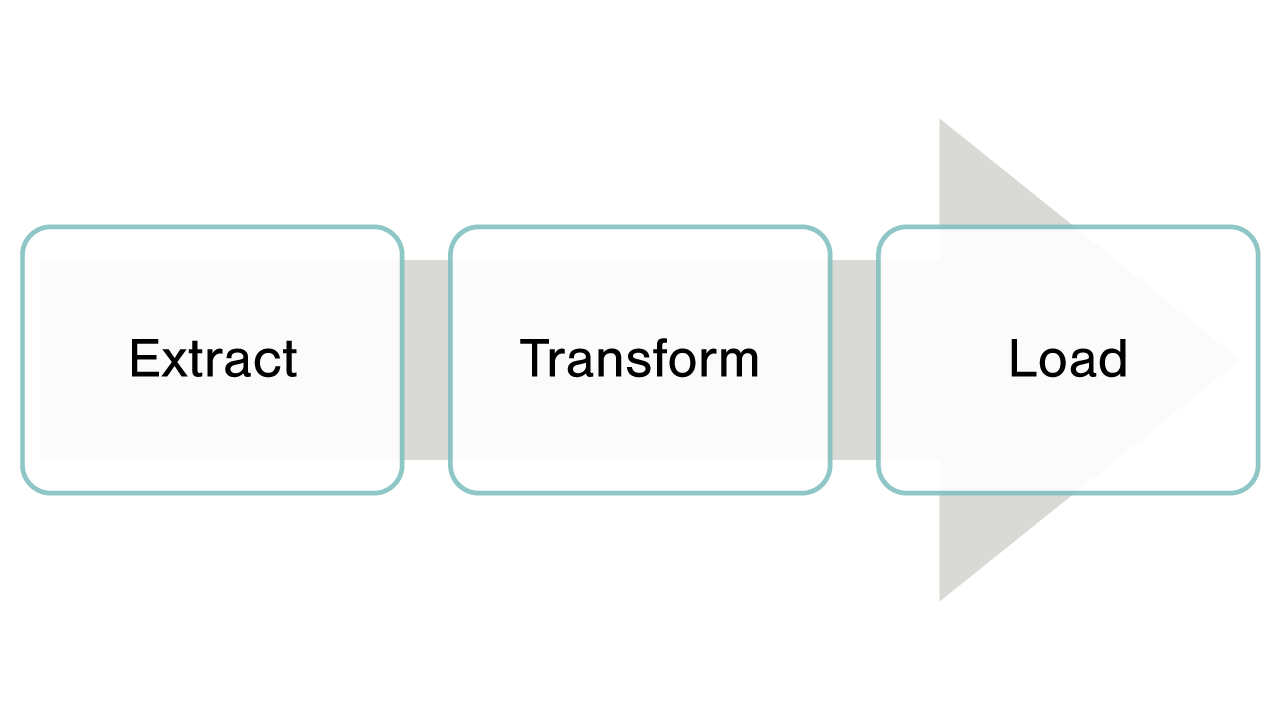
A Brief Description of ETL
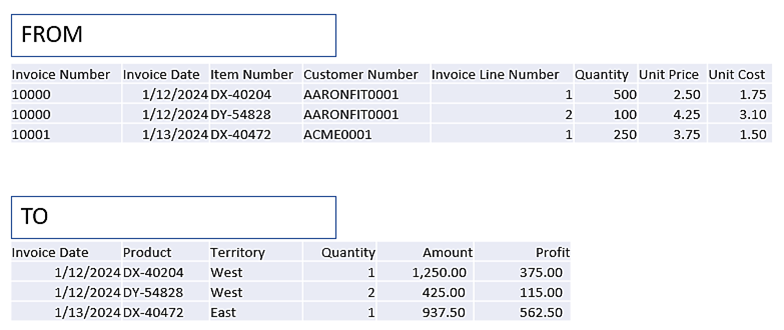
The reason for ETL is that the data in the source rarely matches how it should be stored in the destination. For example, you may have detailed invoice information in an invoice system, and you need to create summary records in a reporting system. Moreover, the format of the destination data may change and you may need additional columns.
How ETL Works With Solver
With Solver, you work with modules and dimensions in a data warehouse. A module contains a single fact table. Using the example above, the FROM data might be your source billing system and the TO data could be a module in Solver called Billing Summary.
Using the above example, notice there are three columns not in the source data: Territory, Amount, and Profit. The territory data may come from logic or a customer master table that contains a territory column with a value for each customer. The amount and profit columns are calculated.
In Microsoft SQL Server Integration Services (SSIS), you would create a package that might do these steps:

There are many ways to do things, but let’s look at one way you might accomplish these items in Solver.
Steps in Solver
Create modules in Solver for the billing detail and the summary data.
Below are examples of how these modules can be designed.
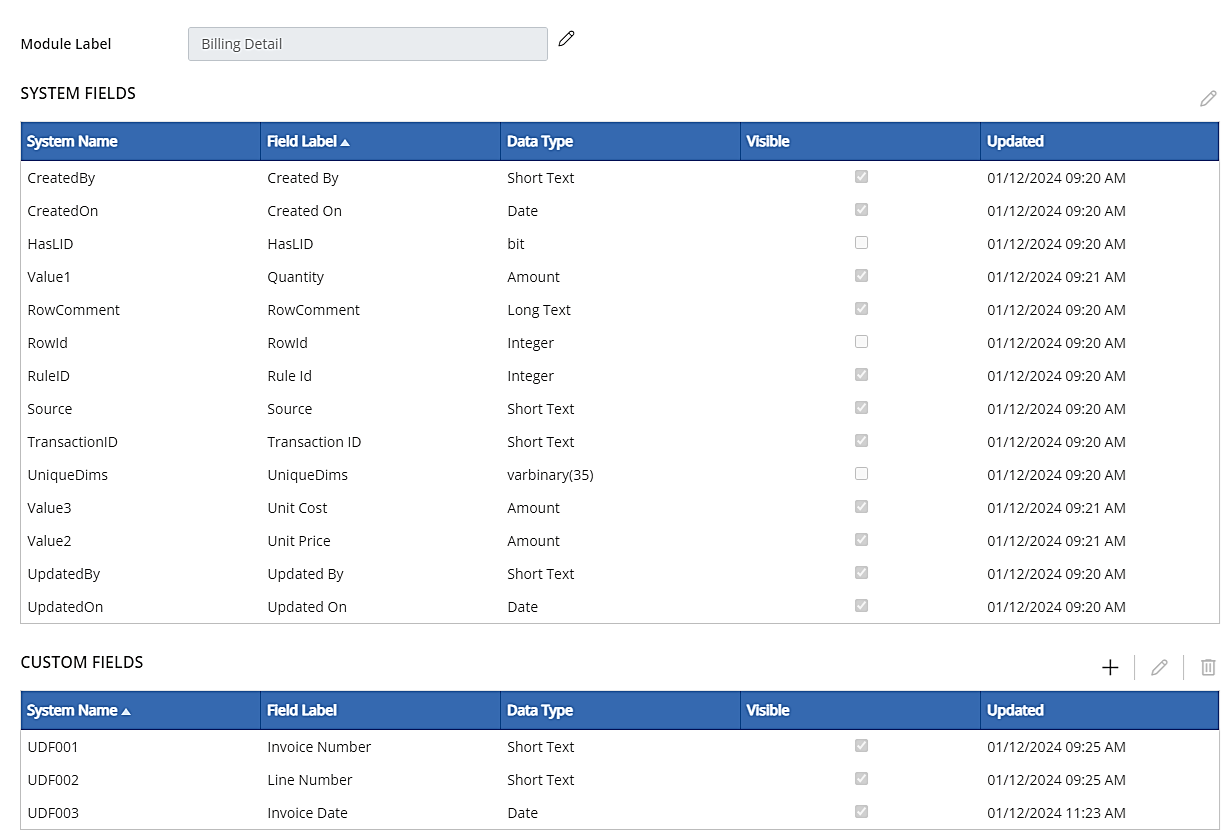
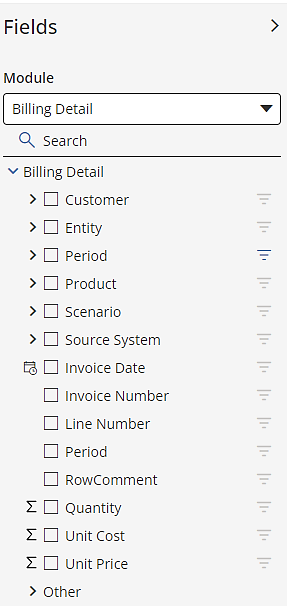
Billing Detail
You’ll notice in the following image there are no columns for customer and item. The reason is these columns will be stored in dimensions. The dimensions will be joined to the module. A later image will show the relationship.
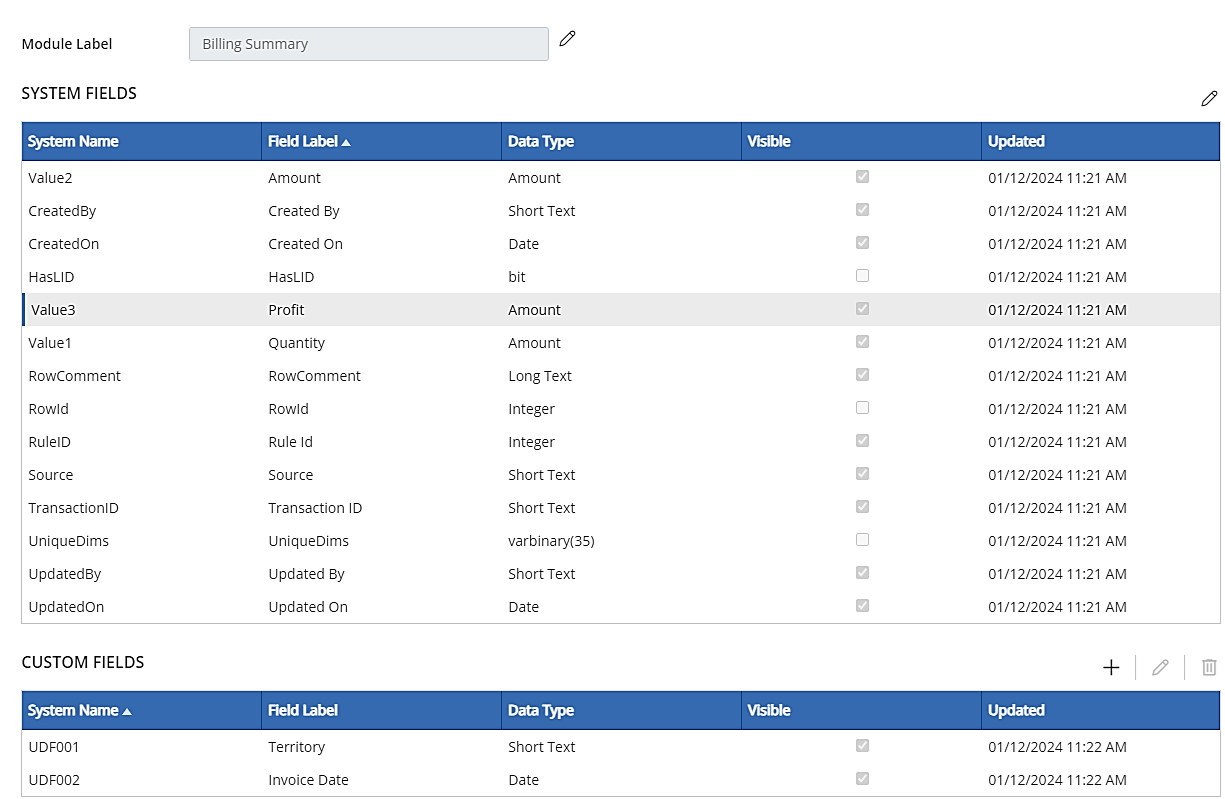
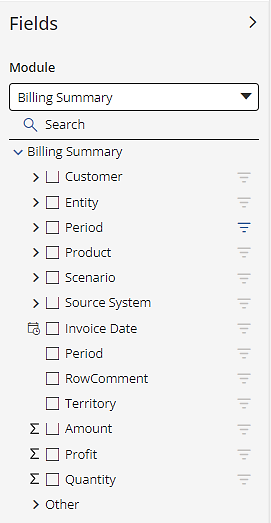
Billing Summary
In this setup, you’ll see a column for Territory. Territory also could be a dimension. For this example, it was set up as a column. The column will be populated during the data feed.
Module Schema
The module schema is how Solver connects the dimensions to the modules. When a dimension is added to a module, the system creates a column behind the scenes in the fact table to store the dimension value.
There are multiple dimensions configured for the two modules. In the image, only two dimensions are shown.

The next image displays the complete configuration for the Billing Detail module. The items with arrows to the left are dimensions.
Similarly, here’s the complete configuration for the Billing Summary module.
Integrations
Once the modules and dimensions are created, the next step is to populate the Billing Detail module with data. For this process, an integration is created.
Solver supports multiple connectors, such as those for different accounting, enterprise resource planning (ERP), sales, and customer relationship management (CRM) platforms. It also has generic connectors. The generic connectors include Excel, SQL Server, OData, and Azure SQL.
Rules
If you’re using SSIS, you would probably have a query that views the data in the Billing Detail table, summarizes it, and adds any data, like Territory. With Solver, you would use a Rule to take data in one table and put it into another table. Rules are created outside of Solver but are imported and run within Solver. Think of Rules as processes that are run.
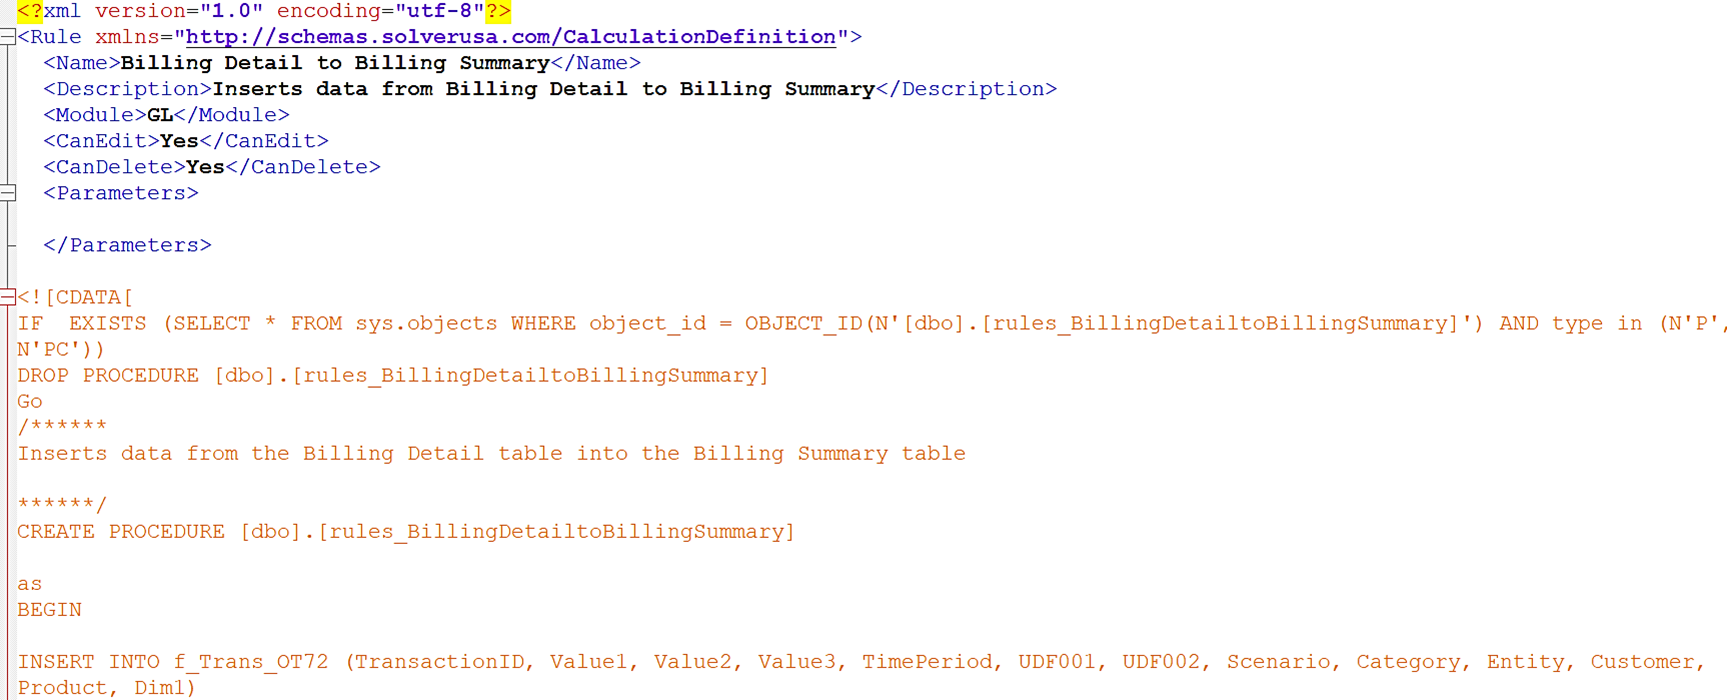
A Rule is, basically, a stored procedure wrapped in XML. There are a few things that you put in the XML portion, like parameters. The heart of the Rule, though, is the stored procedure.
Solver is housed in a Microsoft Azure SQL environment. Thus, it utilizes Transact SQL. In the example above, you would create a Rule that uses a SQL Insert Into statement. Since Rules use Transact SQL, anyone with that knowledge can learn to create a Rule.
For the code, you would reference the objects in Solver.
A simple example of a query would be:
INSERT INTO f_Trans_OT72 (TransactionID, Value1, Value2, Value3, TimePeriod, UDF001, UDF002)
SELECT fields FROM f_Trans_OT71
Here’s how the Rule looks in an editor like Notepad ++.
Here’s how the Rule appears in Solver.

To run the job, you would run it manually or create a job with a schedule. Once the Rule is run, the data will be added to the Billing Summary module.
Summary
We examined how an ETL process can be created in the Solver Data Warehouse. The ETL process utilizes modules, dimensions, and rules. Modules and dimensions store the data while rules process the data. With the data stored in the proper tables, report designers can build the reports necessary to analyze the data.
If you’d like assistance setting up ETL processes or building reports, please reach out. The Insights & Automation team at FORVIS has certified experience with Solver, Microsoft business applications, and leading ERP and CRM platforms.